My Cloud Desktop
My Cloud Desktop
 My Cloud Desktop
Motivation
For quite some time I’ve primarily been using *nix terminal (Ubuntu-WSL2 and MacOS) and VSCode for most of my research/pentest and day-to-day work. I like to keep my base machine as clean as possible with the least number of softwares needed like just the CLI and browser. I would use this bare-minimum software to connect to my cloud machine where most of my softwares/services are installed like nmap,metasploit,awscli,terraform etc …
But the problem was that I the requirement for this machine was quite intermittent and sporadic, it was never constant. So each time I needed the machine, I’d login to my console,start it,change my IP in the laptop and then go about doing my job. This was quite cumbersome and tedious and manual.
Also, I didn’t want to remember the IP address everytime I spin up, just the Domain name as it becomes easier to configure domain names on internet than IP addresses.
Hence, out of pure laziness I decided to write a terraform + ansible script (a combination I’d been wanting to work on for a long long long long long time) that does the following
- Spins up an EC2 Ubuntu Focal (❤️)
- Configures it with my most used softwares - VSCode,NMap,Nuclei,Semgrep,awscli and some pentest tools.
- Configure my Duck DNS domain name (rohit-salecha.duckdns.org) with the IP Address of the EC2 with LetsEncrypt Certificate.
- Have a Source IP restriction such that it is accessible only from a specific IP Address like my home ip.
Pre-Requisites
- An AWS account with credentials configured in CLI
- A domain or a sub-domain.
- Terraform binary installed
- https://developer.hashicorp.com/terraform/tutorials/aws-get-started/install-cli
- Minimum version 1.4
Warnings
Some important warnings before you start using the code
- Running the scripts in this blog will charge you money as we are downloading quite a lot of content to the cloud machine and the bare minimum 4 GB RAM machine is needed which doesn’t fall into free tier.
- Opening up of port 80 is necessary for the entire internet as it’s needed for LetsEncrypt validation. https://letsencrypt.org/docs/allow-port-80/
- Port 53 is also open but no service is currently configured to listen on it. You can start your own DNS server for SSRF pingbacks.
- Any abuse of the code and the service provided is solely the responsibility of the user.
DNS
- Configure your AWS profile in CLI and fire the below command to create a hosted Zone in Route53
aws route53 create-hosted-zone --name ide.domain.com --caller-reference $(date +%s)
- Output will contain a set of four NameServers , you need to update these NS in your DNS config (ZoneFile) of your DNS provider. Wait for about 15 minutes for DNS propagation.
Github Clone
Clone the Github repository
https://github.com/salecharohit/my-cloud-desktop.git
cmd> git clone https://github.com/salecharohit/my-cloud-desktop.git
cmd> cd my-cloud-desktop
cmd> mv terraform.auto.tfvars.bak terraform.auto.tfvars
Once clone is done edit the terraform.auto.tfvars file and configure the following required variables with the necessary data.
# Region of deployment of EC2, its recommended to deploy closest possible to avoid latency
region = "ap-south-1"
# Recommneded is t3.medium or select from here https://instances.vantage.sh/
instance_type = "t3.medium"
#Whether to apply source IP restrictions for SSH Access. IP Address from where you are executing the terraform script will be used to restrict #SSH Access. Check file networking.tf L30
apply_source_ip_restriction = false
hostname                    = "ide.domain.com"
vscode_password             = "vscodeX@123"
key_name                    = "ubuntu"
NOTE : The terraform.auto.tfvars is part of your .gitignore hence any changes made in this file will not be comitted in your remote repository and will only remain on your machine.
Terraform Execution
Once everything is set its time to execute our code using the commands as shown below.
cmd> export AWS_PROFILE=<your-profile>
cmd> cd my-cloud-desktop
cmd> terraform init
cmd> terraform validate
cmd> terraform apply --auto-approve

XXXXXXXXXXXXXXX------SNIPPED-------XXXXXXXXXXXXXXXXXXXXX
Apply complete! Resources: 41 added, 0 changed, 0 destroyed.

Outputs:

server_ip = "15.206.158.91"
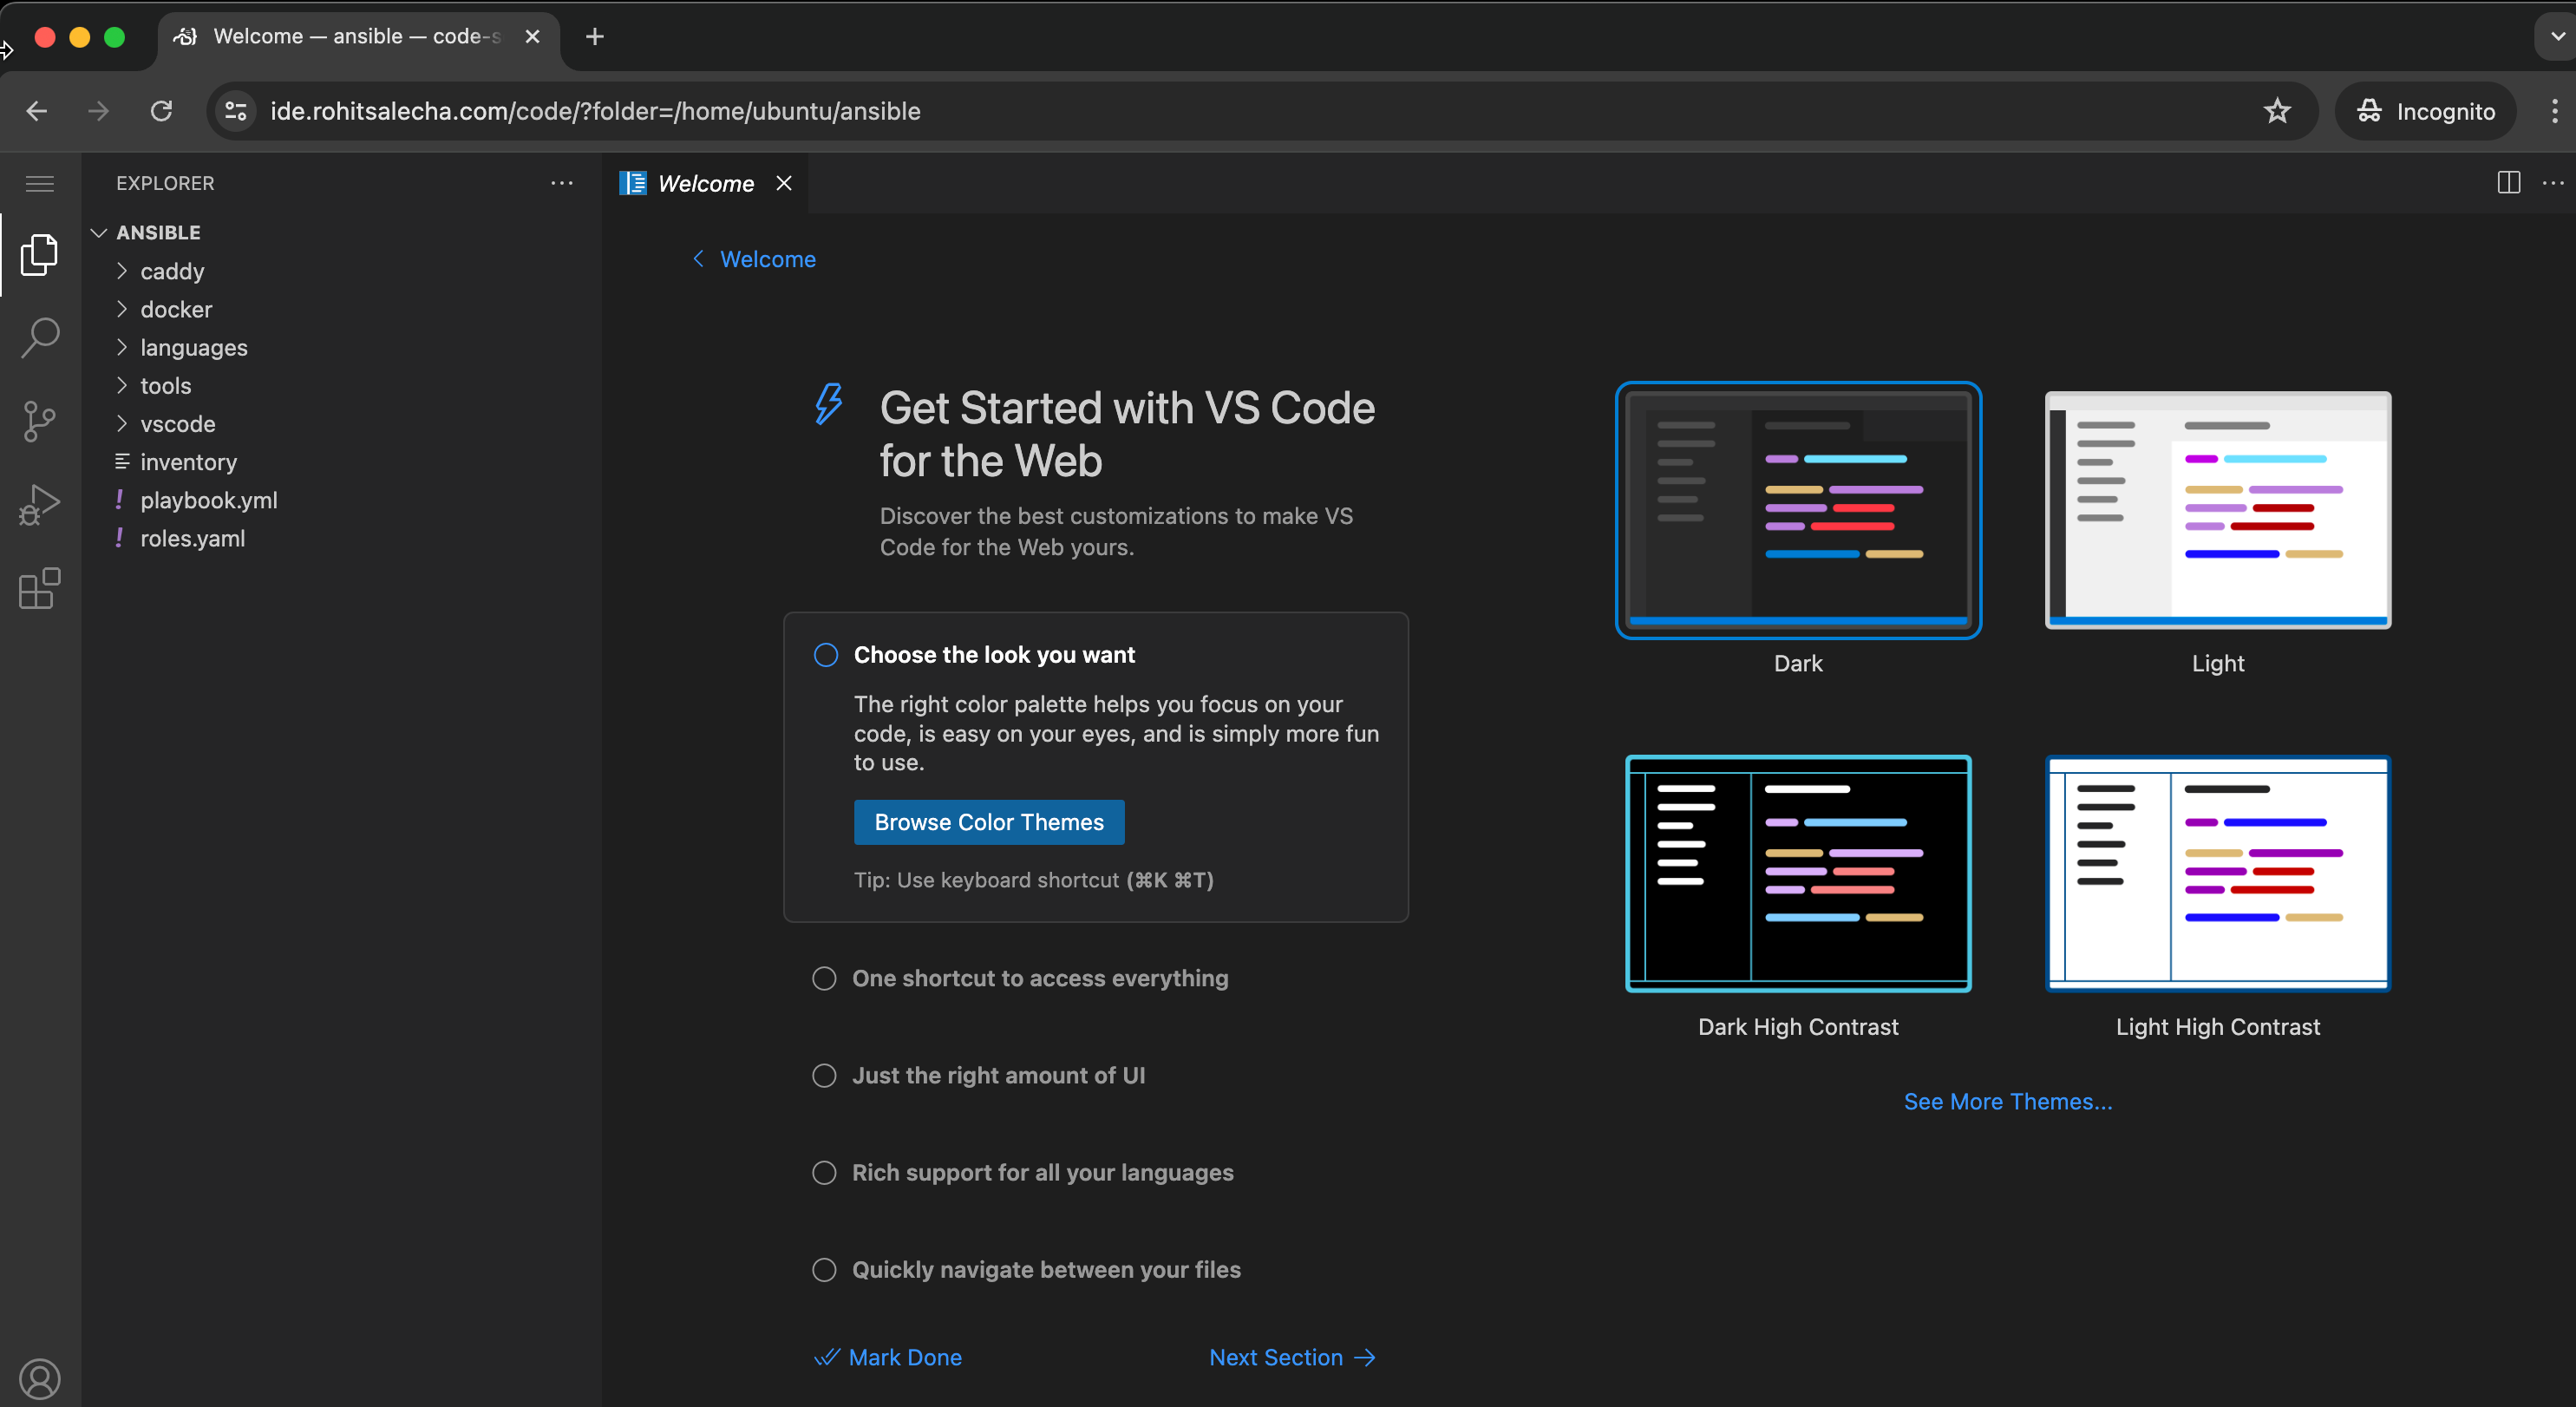
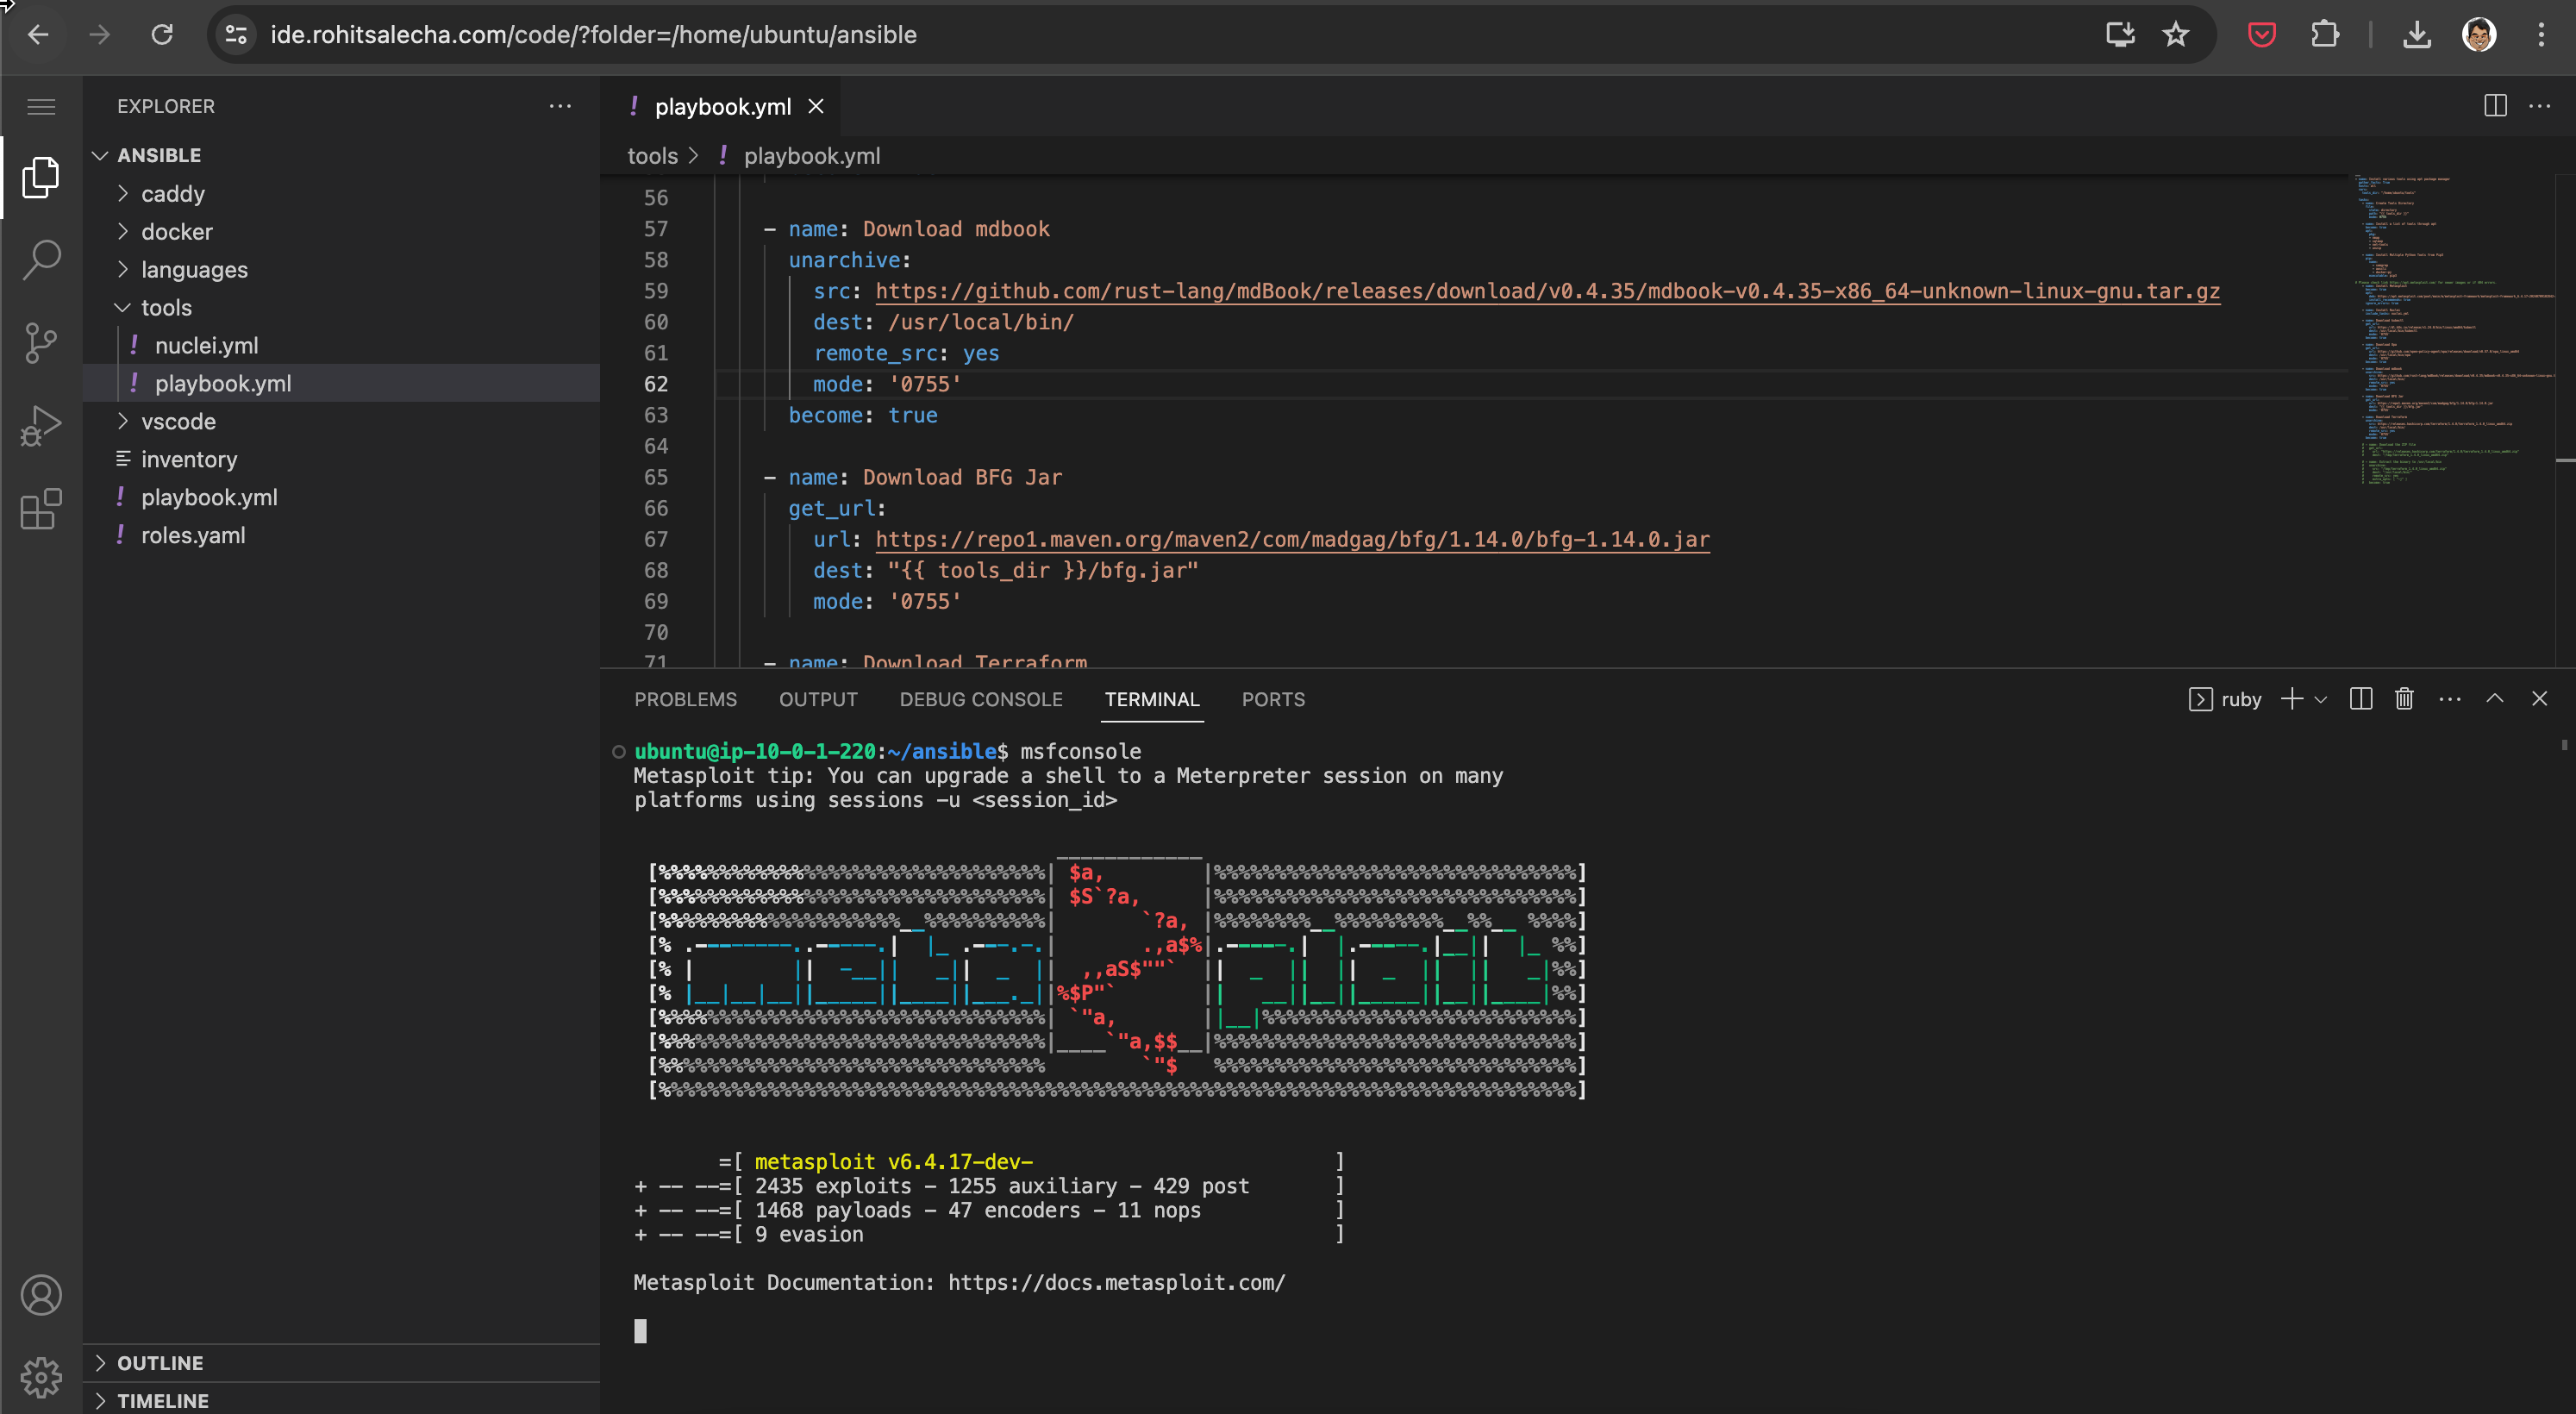
Accessing VSCode in browser
Once the apply is complete navigate to domain name you’ve configured and enter the password as shown in the screen below.

After entering the password we can start using VSCode as shown below.
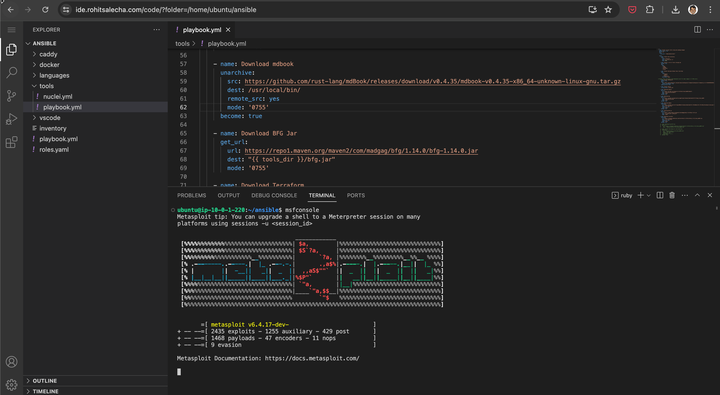
Accessing Terminal from VSCode ex : Metasploit
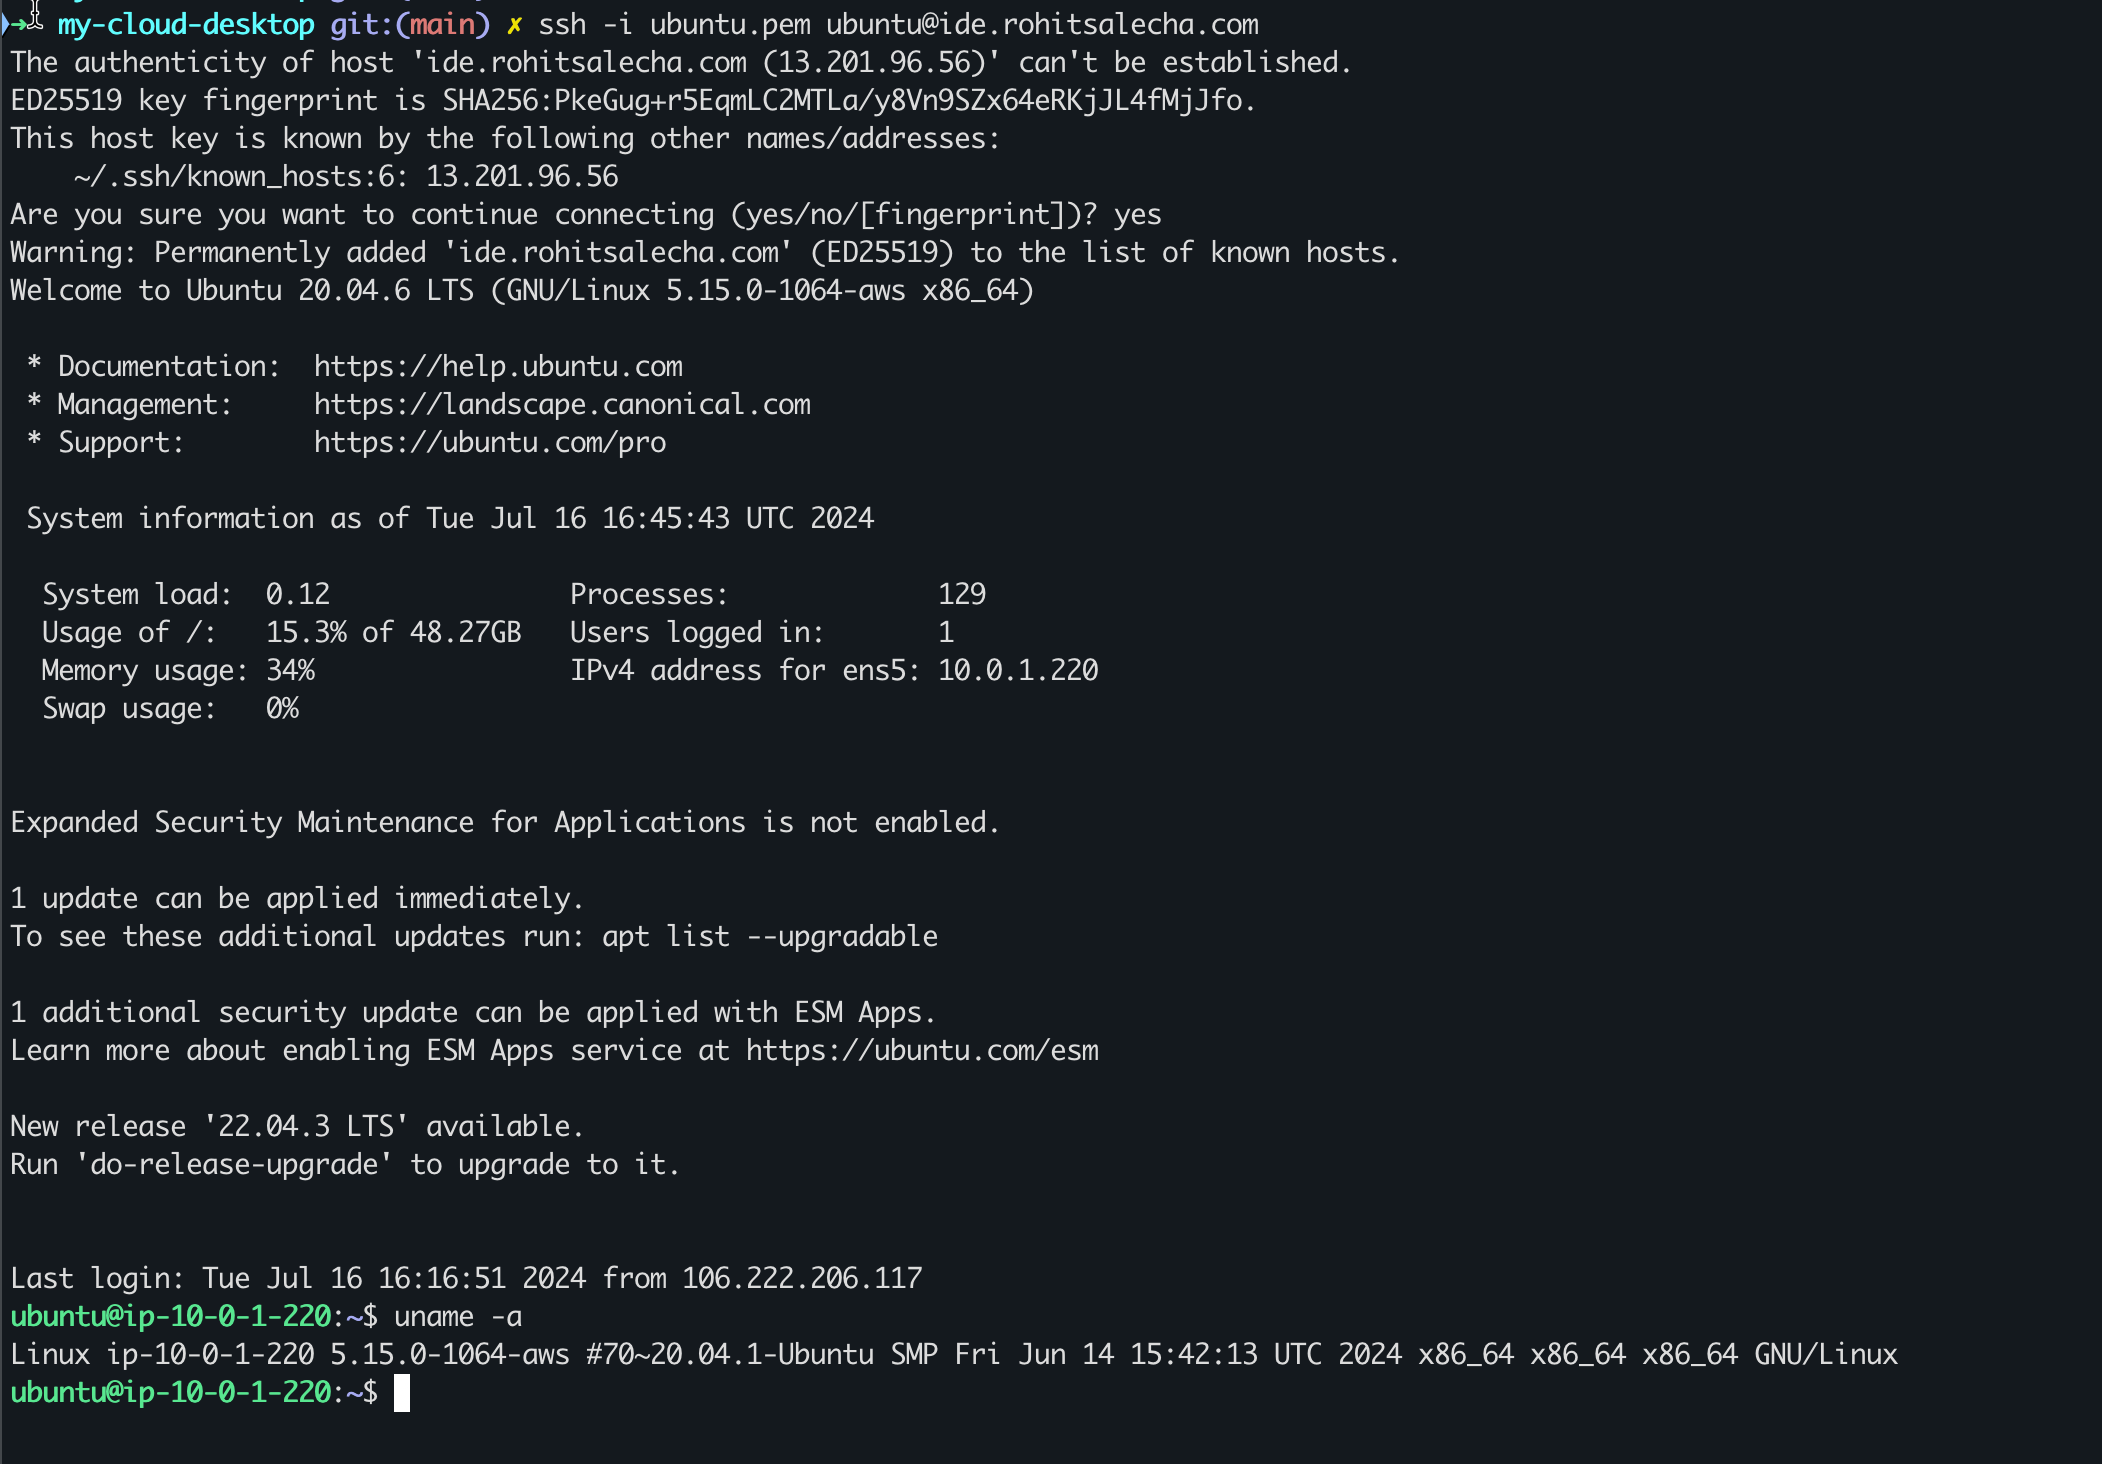
Accessing Server through SSH
The code generates a private SSH key called ubuntu_key.pem in the keypair.tf file and stores it in your local system. The .gitignore file ignores all *.pem files and hence this will not be committed to your Git history and usable only from the local machine you are operating from.
Accessing the server is quite simple.
cmd> ssh -i ubuntu_key.pem ubuntu@<your-duckdns-domain>
Or you could also save it in an ssh config as which is something that you no longer need to change now. Just ensure the path-to-ubuntu-key is configured correctly.
Host cloud-desktop
HostName ide.domain.com
Port 22
User ubuntu
IdentitiesOnly yes
IdentityFile <path-to-ubuntu-key>/ubuntu_key.pem
Accessing Miscellaneous Services
In case you wish to access any GUI service within the server that’s running on a port like 8080, but you donot wish to open it up on the internet then simply execute the following commands.
ssh -i ubuntu_key.pem ubuntu@ide.domain.com -L 8081:localhost:8080
curl http://localhost:8081
Using the above command you are instructing that port 8081 on your local computer needs to be forwarded to port 8080 on the EC2 server. This forwarding of the traffic is now happening over a secure channel and you donot have to open up your machine to the internet.
Terraform Destroy
To destroy the app simply fire the below command
cmd> export AWS_PROFILE=<your-profile>
cmd> terraform destroy --auto-approve
Rohit Salecha
Security Engineering
Rohit Salecha is a technology geek who loves to explore anything that runs and understands binary. As a security engineer he is passionate about learning the length,breadth and depth of technology. Being more on the defensive side he has evangelised secure software development at various organizations for more than a decade. He is ridiculously driven by “everything as code” mantra and strongly believes that security team must strive towards making themselves irrelevant.