Turning Your Windows Into A Linux Powerhouse
Running linux seamleslly on Windows without virtualization
This blogpost is actually a compilation of my efforts at making my Windows environment a lot more CLI and open source friendly. The idea of writing this post is that it serves as a reference for me in the future and for others who would wish to have a more CLI friendly windows.
When I started to learn about DevOps I found myself increasingly using CLI for almost everything git,docker,vagrant etc… Every time I want to access my VM i had to start putty but later the openssh clients in Windows were a great relief from putty but still lacked the feel of running a linux terminal.
So I started struggling to convert my Windows environment to make a little more CLI friendly so that i can not only have a good shiny terminal but also make use of plenty of other tools like sed,awk,ripgrep,find etc… which at times are really useful to edit files/folders.
Below are some softwares/tweaks that I used to convert my Windows machine to be a little more like Linux where I could enjoy the best of both worlds.
Below is the agenda of my post in the order shown.
- Chocolatey
- ConEmu
- WSL
- Vagrant
Chocolatey - Windows Package Manager
After using the apt package manager in linux i felt the entire process of installing softwares on windows made me feel like going to the dark ages. Look up for your software on google, select the 64-bit version,download then click next next next it just was too boring and slow.
Then my manager Anant Srivastava, introduced me to this (not-so-edible) software called Chocolatey Just fire your terminal in admin mode [Win+X –> Windows Powershell(admin)] and run the command
choco install <software-name>
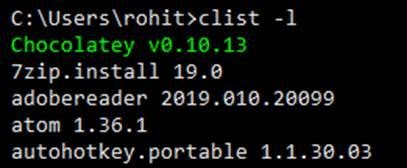
Listing Installed Chocolatey programs
clist -l
Updating installed chocolatey packages
Just one command will update all your chocolatey packages
cups all -y
The best way to use this command is by executing it using a task scheduler. This will guarantee that all your softwares are updated to the latest versions.
Ensure to check the “Run with highest privileges” option. Else choco won’t be able to update anything.
Adding the Task Scheduler action
ConEmu - Terminal Emulator for Windows
choco install clink conemu
One of the biggest pain point for developers with Windows is the terminal. No multi-tabbing support , poor font support and many more things. There are a handful of applications i tried to get a better terminal emulator for normal SSH related work as well as file/folder operations natively. The best , in my opinion , is ConEmu coupled with clink. The above command should get your terminal up and ready looking something like below.
ConEmu has plenty of configurations and everything is saved in the ConEmu.xml which will give this below multi-tabbed Windows emulator.
Some interesting shortcuts that I have configured within my ConEmu.xml
Start a terminal
Type ‘bash’ from anywhere Windows+R or in the Explorer Bar or from an existing windows cmd prompt to get a bash window
Opening New Tabs (Duplicating)
Windows+W
Opening Different Tabs
Windows+Shift+W
Renaming A Tab
Ctrl+Shift+R
Toggling between different Tabs
Windows+Left/Right Arrow Key
Customizations with ConEmu is endless.
WSL - Windows Subsystem for Linux
“How to run linux binaries in Windows?” There are two answers for this question
- Cygwin
- WSL - Windows Subsystem for Linux
Cygwin was a really useful and workable solution and has been around for quite some time but has many limitations for ex if you wish to add a new package you need to run the cygwin installer , search from the not-so-intuitive window full of binaries , select it and then update it. Quite frustrating at times. WSL i.e. Windows Sub-System for Linux takes away the pain of managing a separate application for and works quite seamlessly with Windows and after having a good terminal emulator like ConEmu things become very interesting and comfortable for some command-line kung-fu.
Installing WSL
Before installing WSL ensure that you have disabled OpenSSH from the “Optional Features” section in the settings. Open a powershell window in an administrator mode and enter the following command
Enable-WindowsOptionalFeature -Online -FeatureName Microsoft-Windows-Subsystem-Linux
Once the process is complete , open the Microsoft Store app and search for Ubuntu and install that app. Other options available
System restart will be required at this point. After system restart , simply type in “bash” from anywhere Run Prompt , Explorer , Windows command prompt and you’ll be asked to create a linux user after which you are all set to use Ubuntu on Windows !
WSL Tweaks
After installing Ubuntu if you are happy with it then don’t follow this section. This section is for advanced users only who very well understand these “hacks” which are more or less experimental in nature.Hence, take proper backup before trying them out.
WSL File Permission tweaks
After modifying the home directory when you attempt the access the SSH private keys to connect your server you would get a permission error. Naturally you would then try
chmod 600 <key>
But this would not really work because by default , WSL is not allowed to modify the files and folders of the Windows host system. Hence, we now need to perform yet another tweak so that using WSL we can manipulate all the files and folders within the Windows OS. I would highly recommend to change permissions of only those files from WSL which will be required within WSL. Don’t play around with permissions of Windows files through WSL as it may have unknown consequences. This blog by Microsoft details the update of WSL which enables us to modify ACLs of windows files. Fire up a terminal and lets first unmount the c drive on WSL and then remount if using the metadata flag as shown below
cd /
sudo umount /mnt/c -f
sudo mount -t drvfs C: /mnt/c -o metadata
Next create a file /etc/wsl.conf and add the below data in it and restart your terminal.
# Enable extra metadata options by default
[automount]
root = /
enabled = true
options = "metadata,umask=22,fmask=11"
mountFsTab = true

# Enable DNS - even though these are turned on by default, we'll specify here just to be explicit.
[network]
generateHosts = true
generateResolvConf = true
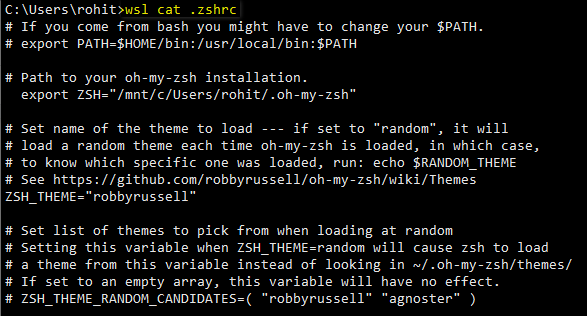
That’s it ! Now we can modify Windows files from within the WSL. Additionally you could install ZSH and the Oh-My-ZSH on WSL if you wish to jazzup your command line experience. WSL is maturing at a rapid pace and increasingly becoming a must-have utility for developers who generally switch over to Linux for *nix features and tools. Currently WSL is running as an application on the Windows kernel , but Microsoft in October is going to ship a linux kernel within the Windows OS ! Sounds like doomsday for MacBook !
WSL Home Folder Tweak
Now when in the Ubuntu shell when you do cd ~ , you’ll be directed to the /home/ directory in the above location. What this means is that WSL and Windows both have a different home directory.
Now this was a big problem for me because I rely heavily on SSH keys and the config file stored in the .ssh directory of the home folder to connect to my servers. If we install WSL it would definitely be a good idea to disable the OpenSSH installed by Windows by default and rather use the OpenSSH of Linux sub-system , after all we are installing it for leveraging all the linux capabilities.What needs to be done in this scenario is to keep a copy of all the data in the .ssh folder in the sub-systems /home/<username>/.ssh folder which i am sure you would agree is a big pain.
After researching a bit and reading plenty of blogs I followed the solution
here to simply modify the home path of the linux user in the /etc/passwd file from /home/<username> to /c/Users/<username> as shown below.
ubuntu❌1000:1000:,,,:/c/Users/rohit:/bin/bash
After modifying the /etc/passwd file ensure you copy all the .bashrc and .profile and other files from your sub-system home directory to Windows home and restart your terminal and type cd ~. This time you’ll be directed to the home directory of Windows ! Means now your Unix system and your Windows system are sharing a common home directory ! You can now use the SSH config and key files stored in the Windows home directory and use the ssh command of the ubuntu system !
Executing Windows binaries from within Ubuntu shell
By default when WSL is installed , it’ll append the Windows PATH to ubuntu’s PATH as shown below.

What this means is since /mnt/c/Windowsis already part of the PATH in ubuntu , i can easily run commands like explorer.exe and open file browser for that directory. However , if i wish to open chrome.exe or any other program from with bash shell then it wont work.
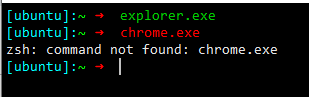
So now , in order to open chrome.exe from bash , all we need to do is add chrome.exe in Windows PATH ! That is it ! WSL will automatically append the PATH from windows.
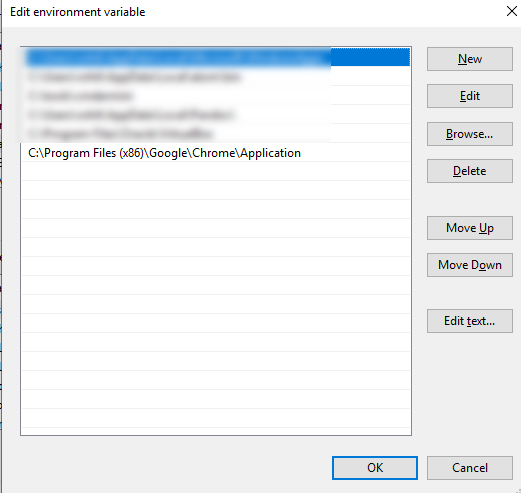
We only need to restart the bash shell and fire chrome.exe However this default setting can be unset by simply modifying the registry flags for WSL
Executing Ubuntu binaries in Windows Shell
How to go about executing a unix command on windows ?
Simple just append ‘wsl’ to the command !
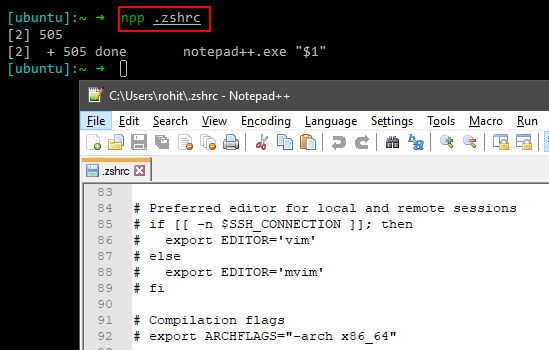
It is recommended to use only one terminal as far as possible owing to the CRLF confusion amongst both operating systems. The line endings will be different when you save a text file from a windows prompt as against that from a linux prompt. Hence , by far i try to use bash as my default command prompt and even execute Windows binaries from there. For Ex: I am totally addicted to notepad++ so i wrote this small function in my .zshrc (you can add in .bashrc if you are using bash) which basically opens any file from bash prompt in notepad++
npp() {
        notepad++.exe "$1" &
}
Vagrant - Making VMs through code !
Even with good number of linux binaries now available with WSL there are a few applications that require a dedicated linux kernel like Docker. Apart from Docker there are multiple other use-cases where you may want to have virtual machines installed in your system for development purposes.
It may require a good 2-3 hours to setup a Virtual Machine using Virtual Box or any other emulation software. Downloading the ISO,setting up the VM , configuring the VM and so on. This process is quite manual,error prone and a person were to document all the steps required for creating different virtual machines would shortly quit his job for sure.
Enter Vagrant
choco install virtualbox vagrant
We just need a single Vagrantfile to spin up a Virtual Machine in just a few minutes with complete provisioning under our control. This Vagrantfile will spin up an Ubuntu 18.04 VM with docker and docker-compose installed. Here we have used Shell provisioning but there are other provisioning providers like Ansible that can be used quite easily.
Vagrant Commands
Starting a VM - cd to the folder where Vagrantfile is stored and type
vagrant up
Pausing a VM
vagrant halt
Shutting down a VM
vagrant down
Destroying a VM
vagrant destroy
Re-Provisioning a VM
vagrant up --provision OR vagrant provision
Accessing the Vagrant VM through SSH
vagrant ssh
Vagrant is quite extensible by making use of various plugins. Below are some of the plugins that I use. The vbguest plugin installs the VirtualBox Guest Addons to the image installed
vagrant plugin install vagrant-cachier vagrant-clean vagrant-disksize vagrant-vbguest
If you are looking at installing Docker on your Windows host machine using WSL it is also possible as described here. So go ahead and make your Windows linux-friendly !
Rohit Salecha
Security Engineering
Rohit Salecha is a technology geek who loves to explore anything that runs and understands binary. As a security engineer he is passionate about learning the length,breadth and depth of technology. Being more on the defensive side he has evangelised secure software development at various organizations for more than a decade. He is ridiculously driven by “everything as code” mantra and strongly believes that security team must strive towards making themselves irrelevant.